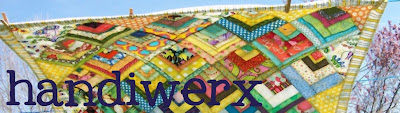
A "Whole Paper" Method
Sorry about that window in the last blog. It's a Google utility that works... sometimes. Here's the info without the toy. :)
I have googled and searched but haven’t found anyone else using a similar method of paper-piecing. For me, it works better than anything else I have tried. Quilt designer, Amy Buehler taught a class that I attended where she taught her method of freezer paper-piecing.
Foundation and freezer paper-piecing (where you cut the pieces apart) are combined here. You cut apart some sections, but not as much as cutting individual pattern pieces of freezer paper (FP).
BENEFITS: You don’t have to pick bits of paper from the back of your piece. - Because you don’t actually sew on the FP, your pattern is reusable for 4-6 times. If piecing many blocks of the same kind, reusing the pattern saves FP and a considerable amount of time.
METHOD:
Copying Your Design
Make an identical copy of your design using one of these two methods:

DOWNLOAD .PDF OF THIS PAGE
Sorry about that window in the last blog. It's a Google utility that works... sometimes. Here's the info without the toy. :)
I have googled and searched but haven’t found anyone else using a similar method of paper-piecing. For me, it works better than anything else I have tried. Quilt designer, Amy Buehler taught a class that I attended where she taught her method of freezer paper-piecing.
Foundation and freezer paper-piecing (where you cut the pieces apart) are combined here. You cut apart some sections, but not as much as cutting individual pattern pieces of freezer paper (FP).
BENEFITS: You don’t have to pick bits of paper from the back of your piece. - Because you don’t actually sew on the FP, your pattern is reusable for 4-6 times. If piecing many blocks of the same kind, reusing the pattern saves FP and a considerable amount of time.
METHOD:
Copying Your Design
Make an identical copy of your design using one of these two methods:
- Inkjet Printer Method (no laser printers allowed as this will ruin it!) - Using an old rotary cutter blade and ruler, cut the freezer paper to 8.5”x11.” - Print directly on to the paper side of the FP (shiny side should be down.) - To reduce printer jams, flatten the FP.
- “Needle Stitching”: If you don’t have an inkjet printer, use this method (explained on Page 4.)
TIPS: When ironing paper to fabric, always place the fabric and the freezer paper “Back-to-Back.”
When sewing fabric, always place right sides together or “Front-to-Front.”
Never sew on the paper. Instead, stitch closely to the folded paper line.
 |
| Set your iron on high heat. Iron the back/ shiny side of PIECE1(to back/wrong side of fabric to FP. Hold pattern and fabric up to the light if you are unsure that you have the pattern covered with fabric. Be sure to cover piece by 1/2 inch all the way around! |
 |
| Fold back to the piecing line between Piece#1 and # 2. |
 |
| Make sure each piece fabric has ¼ inch seam allowance (trim if needed.) |
 |
| Place fabric for PIECE2 facing PIECE1 (Face-to-Face) Sew right up against the line—DO NOT sew on FP! Sew ¼” past each end of the line (it’s okay to sew further.) |

- Gently remove FP from the back of all finished design sections.
- Take care not to pull away quickly as this may cause the edges to fray. Repeat this method until all pieces are together.
- Repeat for all pieces until you’re finished! If you have questions, please leave a comment and I will get back to you.
"Needle Stitching"
TIP: If you have many blocks to sew from one design, you can make three copies at once.
 |
| Using standard copy paper, print your design. Pin or tape paper design to matching size FP. |
Use the point of your iron--set to medium high--to spot iron 3 sheets of FP together.
Then you can sew through all three!
- Remove the bobbin and top thread from your sewing machine.
Put in an old, dull needle for piecing the paper - Set your stitches as long as possible.
- Carefully stitch on all of the lines of your design.
- Hold the perforated design up to light to make sure all lines are stitched.
- Transfer your numbers with pencil or indelible ink (not ink pen!) DON’T FORGET to put a good needle back in your machine!
No comments:
Post a Comment